Monday, November 2, 2020

Fairy Hugs Store-Slimline Thanks Card

 Welcome  to the Fairy Hugs Store Blog. Today, it is my turn to share my most recent project with you. Please become a follower by signing up in the side bar!  If you would like to get the Fairy Hugs Store newsletter via email with updates please visit the Fairy Hugs Store and sign up using the pop-up Window.


I am back again with a Slimline Card. For this card, I used only one stamp set, Fantasy Flowers, and created a garden scene. I inked the images in three different colors using Gina K Inks and also used the same colors to do the splatter on the back of the card. I also used some die cuts from my stash and cut out the work Thanks and popped them up on the surface of the card. 


Hope you all enjoyed this card. Be sure to keep checking out the website for all of the new monthly release images on the way.  If you are interested in enjoying more fun with Fairy Hugs, please stop by and join our Facebook Group, Fairy Hugs Store, where you can share your creations.       

                                                                    Thanks for stopping by. 


Monday, September 28, 2020

Fairy Hugs Underwater Scene

  Welcome  to the Fairy Hugs Store Blog. Today, it is my turn to share my most recent project with you. Please become a follower by signing up in the side bar!  If you would like to get the Fairy Hugs Store newsletter via email with updates please visit the Fairy Hugs Store and sign up using the pop-up Window.

Today I created a card using the Cora. l Reef  and the mixture of stamps. I am using the SeaHorses, Starfish and Mini Scallop Shell stamps. I went ahead and stamped and fussy cut them out. I added some glitter to the seahorse.  I created a frame and added some tulle in the background in the frame and popped up the stamps using foam tape. 


If you are interested in enjoying more fun with Fairy Hugs, please stop by and join our Facebook Group, Fairy Hugs Store, where you can share your creations.       

                                                                    Thanks for stopping by. 


Monday, September 21, 2020

Fairy Hugs-Kissing Fairy Card

 Welcome  to the Fairy Hugs Store Blog. Today, it is my turn to share my most recent project with you. Please become a follower by signing up in the side bar!  If you would like to get the Fairy Hugs Store newsletter via email with updates please visit the Fairy Hugs Store and sign up using the pop-up Window.

Today I created a card using the Starry  and the stamp called Kissing Fairy. I used a circle stitched die for cutting out the stamp image and then made two triangle slices with the paper. 


Starry Moonlight Paper                                                       Kissing Fairy   


If you are interested in enjoying more fun with Fairy Hugs, please stop by and join our Facebook Group, Fairy Hugs Store, where you can share your creations.       

                                                                    Thanks for stopping by. 


Monday, September 14, 2020

Fairy Hugs Shaker Card

 Welcome  to the Fairy Hugs Store Blog. Today, it is my turn to share my most recent project with you. Please become a follower by signing up in the side bar!  If you would like to get the Fairy Hugs Store newsletter via email with updates please visit the Fairy Hugs Store and sign up using the pop-up Window.

Today I created a shaker card using the Coral Reef Papers and the sea turtle stamp, Raphael. I used two circle dies to create the circle and popped it up with foam tape. Then I added Raphael in the middle with some sequins and my shaker card is done. 


Raphael             Bronze                    


If you are interested in enjoying more fun with Fairy Hugs, please stop by and join our Facebook Group, Fairy Hugs Store, where you can share your creations.       

                                                                    Thanks for stopping by. 


Monday, September 7, 2020

Fairy Hugs- Memorydex Card

 Welcome  to the Fairy Hugs Store Blog. Today, it is my turn to share my most recent project with you. Please become a follower by signing up in the side bar!  If you would like to get the Fairy Hugs Store newsletter via email with updates please visit the Fairy Hugs Store and sign up using the pop-up Window. 

Here is my first Design Team project for you to enjoy. It is a Memorydex card using the Net Stamp, Sea Turtle-Raphael, Sea Horses, Glitter and Coral Reef paper.  My first step was to cut the shape out with one of my dies using the Coral Reef paper.  Next I stamp the Sea Turtle, Raphael, and Sea Horses out on white cardstock and fussy cut them. You can't go wrong with glitter so I added Fairy Hugs Ocean and Bronze Glitter to the shell and seahorse. I did a bit of background stamping with the net and popped up the animals with foam tape and tada my memorydex is done. 


Raphael             Bronze                     Ocean 


If you are interested in enjoying more fun with Fairy Hugs, please stop by and join our Facebook Group, Fairy Hugs Store, where you can share your creations.       

                                                                    Thanks for stopping by. 


Friday, September 4, 2020

Fairy Hugs Store DT card-Slimline Card

Did you guys see my exciting news??? I was picked to be on the Fairy Hugs Store Design Team.  This up and coming shop has some fantastic new line of stamps.  My first project for this team is a Slimline Card. 


For this card, I used the following items:

Net Stamp                                    


SeaHorse Stamp                                


Coral Reef Paper 
Image may contain: outdoor

And I will have my youtube video on how I did it up soon.  Thanks for stopping by and see you soon with more projects. 


Thursday, March 5, 2020

Rubbernecker Stamps


Hello everyone. I received some fantastic stamps from Rubbernecker stamps clearance sale. I colored it up with Copic. Some of my favorite stamps are border stamps created by Rubbernecker. 


Tuesday, February 18, 2020

MFT Sketch Challenge

Hey everyone. I created a card using MFT challenge using their Wednesday sketch.


I will be entering this into the following Challenges

MFT Wednesday Sketch Challenge
Colour Crazy Challenge -Anything Colored
AAA Birthday-Cute 
A Perfect Time to Craft-Anything Goes
Love to Craft Challenge-Anything Goes
Crafter's Castle-Anything Goes


Monday, January 20, 2020

HedgeHog Hollow Guest Designer January Post-Writing in the Stars

Hello everyone.  It is Liv here to bring you my last card using Nuvo Shimmer Powders, HedgeHog Hollow Star stencil and the HedgeHog Hollow stamp set. 


My first step was the add the Shimmer powder to my paper. To active the powder, all you need to do is spritz it with water. 

Doesn't it come out amazing after it is done!  I love the abstract effect the Nuvo Shimmer Powder create. 


Once dried, I used the Star Stencil with some Gina K Designs Glitz Gel to add even more shine.  Look at the awesome texture and shine you get when you use the gel.  I finished it off with a sentiment from the stamp set called Aim High 


Want to see how I made both of my Guest Designer cards for this month.  Stop over to my Youtube channel, ORM CraftyDesigns, to watch my process there.


Sunday, January 19, 2020

HedgeHog Hollow Guest Design

Hello everyone. It is Liv and today  I am so excited to be asked by HedgeHog Hollow to be a guest designer for the month of January.  Today I am sharing a card with you featuring embossing and ink blending. 


I started my card with stamping using the HedgeHog Hollow stamp sets called Given Direction and Just a Phase in versamark ink and then added clear embossing powder. 


Next I used my distress inks and inked up the background. 


Here is my finished card. I had a piece left over so decided to do an ATC size card as well. I added sentiments from the HedgeHog Hollow Stamp  Aim High and then do some use the Hedgehog Hollow Star Stencil with some texture pastes. 


Saturday, December 28, 2019

Mixed Media Cards using Lindy's gang Magical Powders

Hey everyone. I hope everyone had a great holiday. Finally having some downtime and decided to play along with Lindy Gang's challenge this month.


The sketch is from a YouTube crafter channel called CallMeCraftyAl who share a sketch every month. 


Used Magicals to create this card using the colors I had for the December challenge. Used the following products from Lindy: Caribbean Blue Magical Powder https://cdn.shopify.com/s/files/1/1557/0287/products/magical_flat_caribbean_cruise__74515.1403709366.1280.1280.jpg?v=1571234126 TweedleDeeDenim Magical Powder https://cdn.shopify.com/s/files/1/1557/0287/products/mad_hatter_2017.png?v=1571234654 and Prima Donna Purple Magical Powder https://www.lindysgang.com/collections/magical-powders/products/drop-dead-diva-magical-shimmer-powders

Want to see how I did it? Youtube video coming soon. Stop by my channel ORM CraftyDesigns on youtube.

Tuesday, December 3, 2019

Kraftin Kimmie Holiday card

I recently watched a really awesome video by Amy Young where she created the floor abd I wanted to give it a try. I am pretty happy with the results.


The stamp is from a Retired Image by Kraftin Kimmie. 

Want to see details on how I colored it. Stop by my Youtube channel for a speed coloring video.

I will be entering this one into the following challenges: 

Kraftin Kimmie Stamp-Add Glitter 


Sunday, November 17, 2019

Stamping Bella Birthday Card

Hey Everyone. Finally had the time to colored up and finish up some bday cards for my stash.

When Stampingbella introduced their Curvy Girl line I was so excited. Had to snag a few when they came out.


As usual I used my Copics to color the image and keep the image as the focus. 

I will be entering this one into the following challenges: 


Monday, October 14, 2019

So sorry I have neglected all of you -Altered Book/Spell Book

Hello everyone. Time has gotten away from me and I realized I have neglect my lovely blog here. I have been done a bunch of altered projects and thought I would share my altered book that I turned into a spell book for Halloween.


So I took an old book I had and added the sides with some paint. Then I google some spell pages and found this really cool ones and printed them off. I also found some free digital tags and papers that are Halloween in theme and printed those out too. For the finishing touches I add some chipboard, lace and embellishments and tada my spellbook is complete.

I will be adding this to a few challenges.

International Art and Soul-Halloween
The library Challenge-Harry Potter
Crafty Calendar Challenge-Halloween
Simply Create Too-Spoooky/Scary
Creative Moments-Halloween
Funkie Junkie Boutique- It's Halloween
The Paper Funday Challenge-Anything Goes Twist Halloween 


Wednesday, October 2, 2019

Hello everyone.  It is Liv today and I am sharing my final DT layout I created using the Echo Park Neverland Collection Kit.  Isn't this kit just the cutest.  This collection is just what you need for those Disney enthusiasts out there. 

I found some old photos from our Disney trips and decided to put it into a layout.  I combined the Chipboard Phrases pieces from the Neverland Layout collection  and some of the Decorative Brads as well.  

I created my own layered embellishments using the Ephemera Lost in Neverland Frames and Tags  from the pack. 


Hope you all enjoyed this layout. Be sure to check out the Fotobella website.   The amazing varerity of collection kids makes scrapbooking and crafting so easy.  


Thursday, August 8, 2019

Fotobella Design Team Loaded Envelope-Bo Bunny Harmony


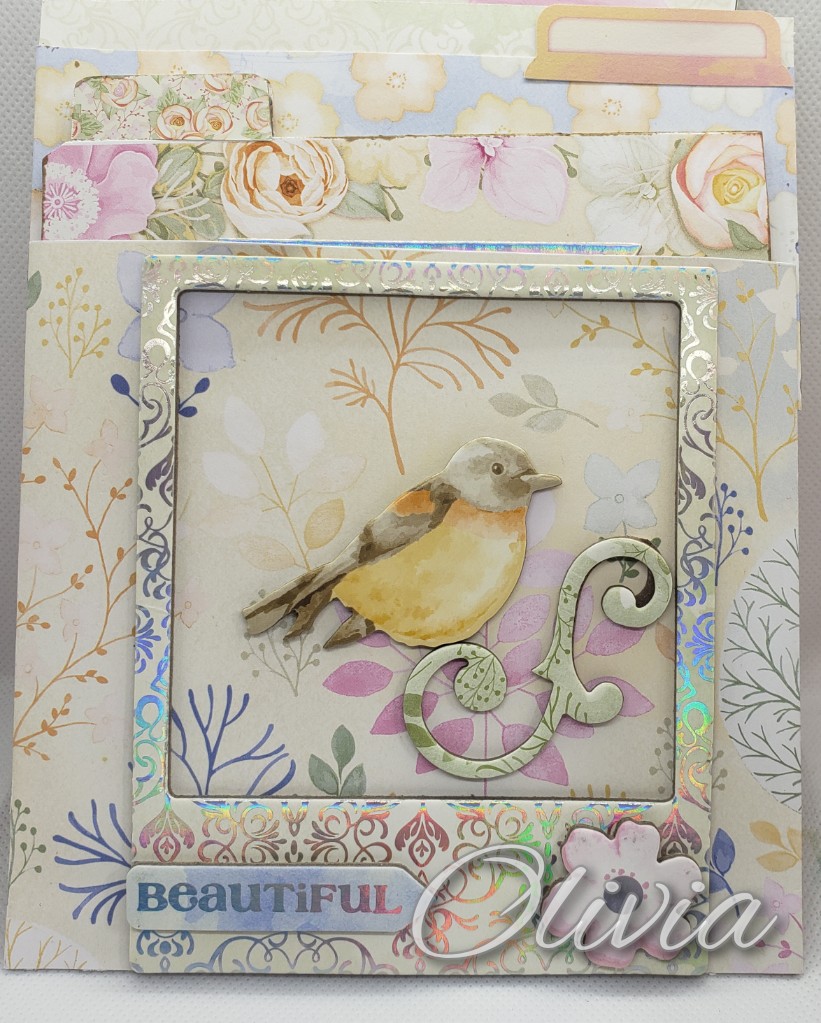
Hello everyone. It is Olivia here and today I am sharing my Flatmail bag that I created. All the embellishments that are in this set are made by me using the Gorgeous papers and Ephemera from the Bo Bunny Harmony Collection. In the photos above is the front and back side of the bag.  I used both the stickers and the chipboard pieces in the Want it All Collection.  Both sides of the bags have two pockets so it makes for 4 areas to stash my handmade embellishments in. 


 Since this project is going out to a crafty friend of mine, I decided to include a Memorydex card. Memory-dex card are basically a crafty way of sending an old-fashion rolodex.  One the front side you create a small mini-crafty masterpiece and then on the back has your contact information.  It is a lovely way to create an beautiful contact list for your friends and family.